
Step-by-Step Guide to Installing a Ceramic Metal Halide Grow Light
Indoor horticulture has evolved significantly, with ceramic metal halide (CMH) fixtures emerging as a premium choice for growers seeking full-spectrum efficiency. According to manufacturer-reported internal testing, NanoGrowLight’s coated reflectors increase reflectance and concentrate more of the fixture’s output onto the grow area. This guide walks you through the precise installation of a 250W CMH fixture, ensuring you maximize the benefits of the Nano Liquid Photonic Coating while maintaining safety and optimal plant health. (Illustrative Use Cases Nano)
Understanding Ceramic Metal Halide Technology
Before you begin the physical installation, it is critical to understand the technology you are working with. Ceramic Metal Halide (CMH) is a type of high-intensity discharge (HID) lamp that provides a broader spectral distribution than typical LED diodes. Unlike LEDs, which can have gaps in their spectrum, CMH produces a continuous full-spectrum output without diode gaps. This continuous output is vital for photosynthesis, supporting everything from vegetative growth to flowering.
The Nano Grow Light fixture utilizes a 250W CMH lamp paired with a proprietary Nano Liquid Photonic Coating. This coating is applied to the fixture’s internal reflector, where it redirects and concentrates light for denser PAR delivery and reduced scatter. The coating consists of nano-scale clusters, approximately 20 to 80 nanometers in size, applied to the reflector. The cured coating measures approximately 2 to 6 microns thick. This technical specification ensures that photons are not wasted on scatter but are instead directed toward the plant canopy.
CMH lamps run hotter than typical horticultural LED fixtures. NanoGrowLight fixtures report approximately 340 BTU/hr of heat output and approximately 45°C surface temperature at steady state. Understanding this thermal profile is essential for safe installation and proper plant placement.
Pre-Installation Planning and Safety
Proper preparation prevents damage to both your equipment and your plants. The first step is selecting the right location. A single fixture covers approximately 3.5 by 3.5 feet. If you are setting up a larger operation, you can arrange multiple fixtures across rows, bays, or multi-tier racks to cover a wider canopy area. For larger installations, growers simply scale up by adding more fixtures, rather than switching to one larger unit.
Ensure your mounting structure can support the weight of the fixture, the ballast, and any necessary hanging hardware. CMH fixtures are robust, but stability is non-negotiable. Additionally, verify that your electrical circuit can handle the load. A 250W lamp, combined with the ballast's energy consumption, requires a dedicated or appropriately rated circuit to prevent overheating or tripping breakers.
Check your environment for humidity levels. While CMH fixtures are durable, the electrical components, particularly the ballast, should be kept dry. If you are installing in a high-humidity grow tent or greenhouse, ensure the ballast is positioned outside the immediate misting zone or in a ventilated area.
Mounting the Fixture Securely
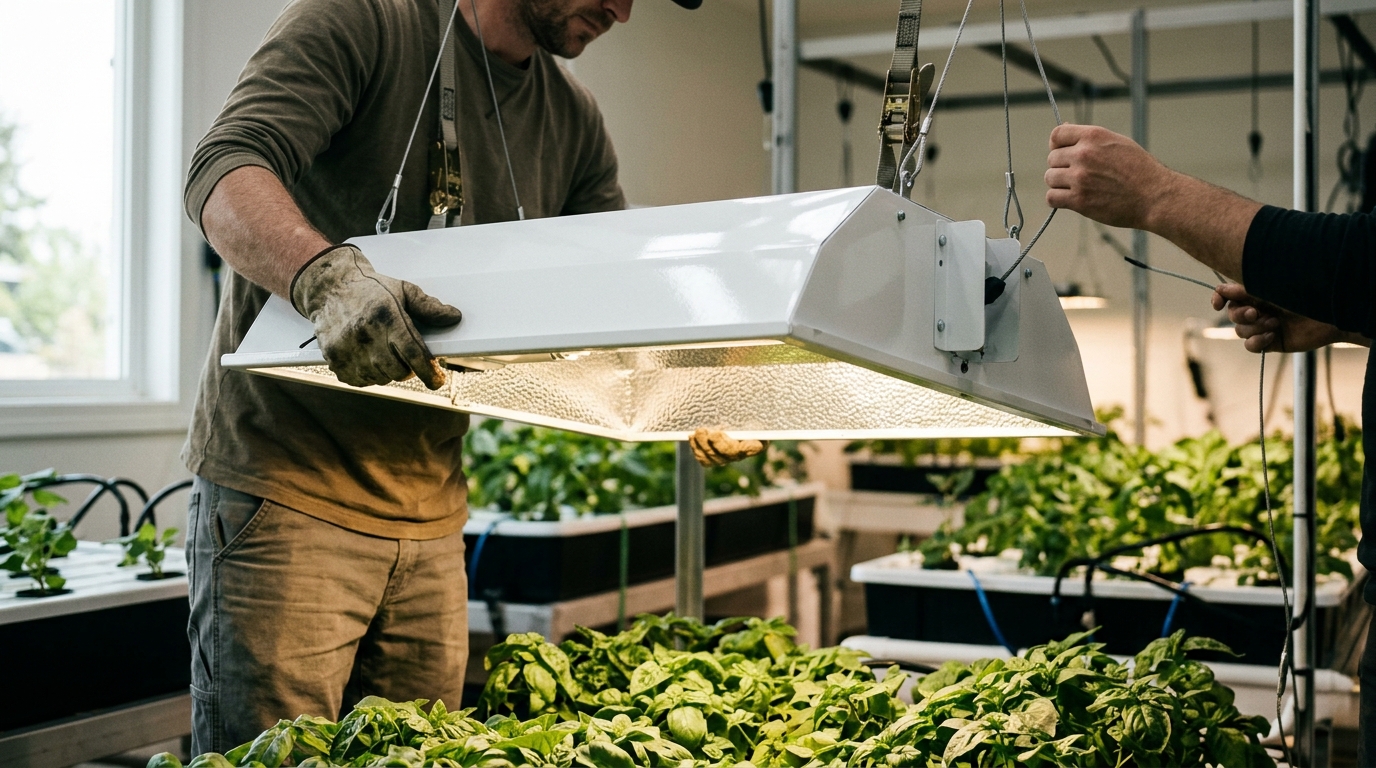
Secure mounting is the foundation of a safe grow setup. Use heavy-duty chain or rope hangers rated for at least twice the weight of the fixture. The Nano Grow Light fixture is designed for easy suspension, but the integrity of the hanging mechanism determines the longevity of your installation.
Attach the hangers to the fixture’s mounting points. Ensure that the chains are evenly distributed to keep the fixture level. An unlevel fixture can cause uneven light distribution, leading to inconsistent plant growth. Once the fixture is suspended, adjust the height to a temporary position. Do not place the light directly over the plants yet. We will determine the optimal height in the calibration phase.
If you are installing multiple fixtures, maintain consistent spacing between them. For a 3.5 by 3.5 foot coverage area, a spacing of 3 to 4 feet between fixtures is typically recommended to ensure even light overlap without creating hot spots. This spacing allows for efficient use of the Nano Liquid Photonic Coating’s directed beam.
Electrical Connections and Ballast Setup
Connect the fixture to the appropriate ballast. Most 250W CMH fixtures require a digital or magnetic ballast rated for ceramic metal halide lamps. Using an incorrect ballast can damage the lamp and void the warranty. Connect the ballast to the power source using a grounded outlet. If you are using a timer, connect the ballast to the timer outlet to automate your light schedule.
Ensure all connections are tight and secure. Loose connections can cause arcing, which generates excessive heat and poses a fire hazard. Use wire nuts or terminal blocks for any splices, and wrap them with electrical tape for added insulation. Route the power cord away from the fixture’s heat source to prevent melting or degradation of the insulation.
For optimal performance, NanoGrowLight recommends using a timer to maintain a consistent 12- to 14-hour light schedule. Consistency is key to plant health, as it mimics natural daylight cycles and supports robust vegetative and flowering stages. You can find more details on scheduling in our blog section.
Calibration and Canopy Positioning
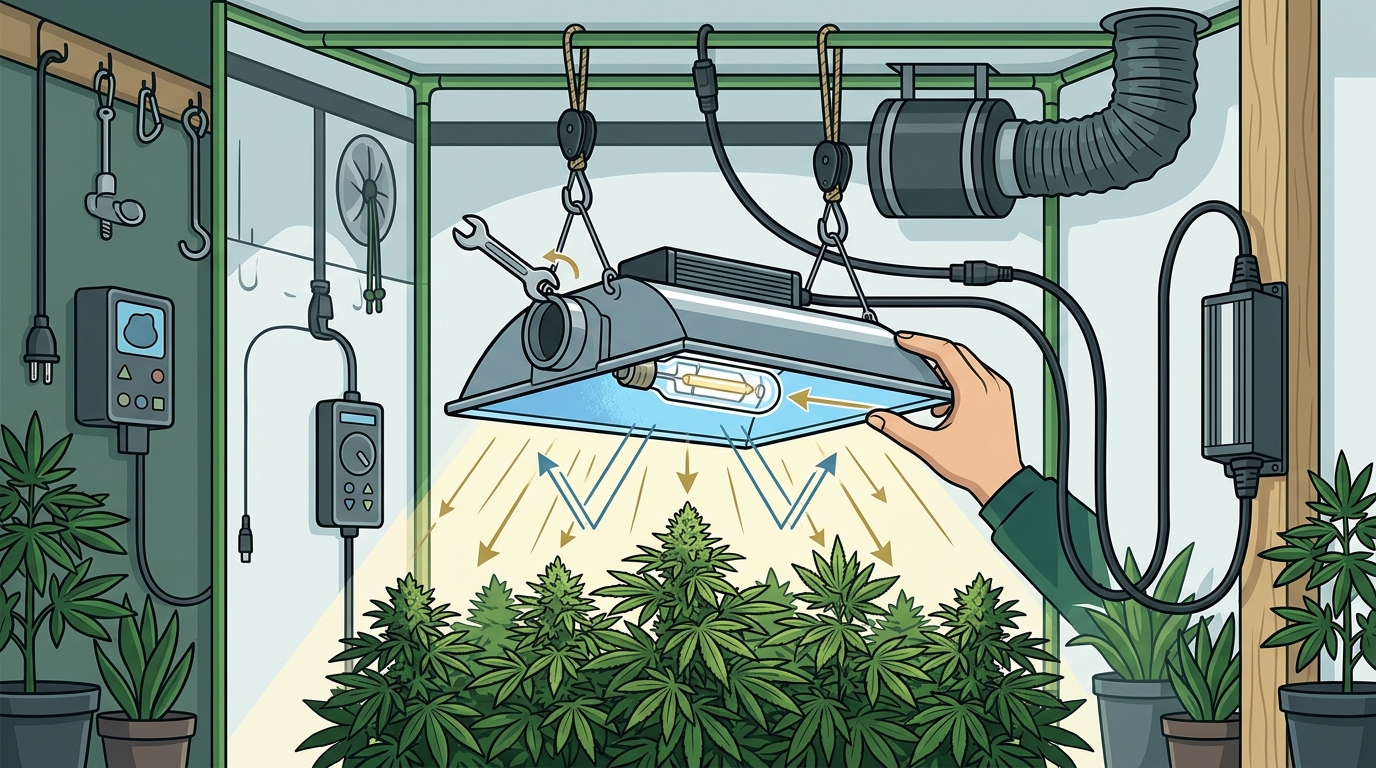
Once the fixture is mounted and powered, the next step is calibrating the height. This is the most critical step for maximizing the benefits of the Nano Liquid Photonic Coating. The coating redirects scattered light into a tighter, more usable beam for faster indoor plant growth. However, this beam must be positioned correctly to be effective.
Start with the fixture at a safe distance from the plant canopy. For a 250W CMH lamp, a starting height of 18 to 24 inches above the canopy is recommended. This distance prevents heat stress while allowing the light to spread evenly. Monitor your plants closely during the first week. Check leaves for signs of stress, such as bleaching or curling, which indicate the light is too close.
If the plants show no signs of stress, you can gradually lower the fixture to increase light intensity. Plants can grow up to 1 inch per day under optimal conditions, reducing a typical 3-month cycle to as little as 2 months. In real-world use, growers have brought fast-cycling crops like lettuce to harvest in as little as 28 days, based on our own testing across 60+ harvests. This accelerated growth is a direct result of the dense PAR delivery enabled by the nano coating.
For African violets, which need bright, consistent, full-spectrum light to bloom well indoors, the Nano Grow Light is an excellent choice. The fixture’s compact size suits a single plant, a small grouping, or a windowsill-style indoor shelf. For general plant care guidance, the University of Minnesota Extension's African violet growing guide offers a helpful independent reference.
Routine Maintenance and Longevity
To ensure the longevity of your Nano Grow Light fixture, regular maintenance is essential. The Nano Liquid Photonic Coating is durable, but it can be affected by dust and debris. Clean the reflector surface periodically with a soft, dry cloth to maintain maximum reflectance. Avoid using harsh chemicals or abrasive materials that could damage the nano-scale clusters.
Replace the CMH lamp according to the manufacturer’s recommendations. Over time, the lamp’s output will degrade, reducing the effectiveness of the nano coating. A fresh lamp ensures that the full-spectrum output remains consistent, supporting healthy plant development. You can purchase replacement lamps and fixtures directly from our shop page.
Inspect the ballast and wiring regularly for signs of wear or damage. If you notice any unusual noises, flickering, or overheating, disconnect the fixture immediately and consult the customer support team for assistance. Proper maintenance not only extends the life of your equipment but also ensures that your plants receive the optimal light they need to thrive.
Key Takeaways
- CMH Technology: Ceramic Metal Halide provides a continuous full-spectrum output, unlike LEDs which may have spectral gaps.
- Nano Coating: The Nano Liquid Photonic Coating consists of 20-80nm clusters, increasing reflectance and directing light to the canopy.
- Heat Management: Fixtures report ~340 BTU/hr output; maintain safe distances to prevent plant stress.
- Coverage Area: A single 250W fixture covers approximately 3.5 by 3.5 feet.
- Growth Acceleration: Optimized setups can reduce harvest cycles for fast-cycling crops to as little as 28 days.
- Spectral Purity: The coating shifts reflected spectrum toward blue and red bands, accelerating photosynthesis.
- Maintenance: Regular cleaning of the reflector and timely lamp replacement are crucial for sustained performance.
Frequently Asked Questions
How far should I hang a 250W CMH grow light?
Start with the fixture 18 to 24 inches above the canopy. Adjust based on plant response to avoid heat stress while maximizing light intensity.
Can I use this light for African Violets?
Yes, the Nano Grow Light is ideal for African Violets due to its full-spectrum output and compact size, which fits well on windowsills or shelves.
What is the Nano Liquid Photonic Coating?
The Nano Liquid Photonic Coating is a proprietary nano-scale reflector treatment designed to redirect and concentrate light toward the plant canopy, increasing usable PAR.
How does CMH compare to LED for indoor growing?
CMH provides a broader, continuous full-spectrum output without the diode gaps found in typical LED fixtures, which can benefit certain plant stages.
Is the Nano Grow Light suitable for commercial greenhouses?
Yes, multiple fixtures can be arrayed for larger indoor operations, including commercial greenhouse supplemental lighting, by scaling up the number of units.
How often should I replace the CMH lamp?
Replace the lamp according to the manufacturer’s recommendations, typically after 10,000 to 12,000 hours of use, to maintain optimal spectral output.
What is the coverage area of a single fixture?
A single fixture covers approximately 3.5 by 3.5 feet, making it ideal for small to medium grow spaces.
Ready to Grow Faster?
Installing a Ceramic Metal Halide grow light is a strategic investment in your indoor horticulture success. By following these steps, you ensure that your Nano Grow Light operates at peak efficiency, delivering the dense PAR and full-spectrum light your plants need. Visit our shop page to purchase your fixture and start your journey toward faster, healthier plant growth today.